
Artist Alley Organizing Hacks
- Jun 9, 2024
- 7 min read

ARTISTS!
Do you find yourself struggling to pack and organize your shop for events? Are your organizational systems clunky, bulky, or otherwise awkward to quickly pack and transport?
Maybe, after a long and tiring weekend, you just want to throw everything in your car and get home as quickly as possible, but you cannot for the life of you remember how you puzzle pieced it all together!
If this sounds like you, you are certainly not alone. It doesn't have to be difficult to condense your shop for transportation. Learn with me to make better choices for the sake of efficiency, because as we all know:
Time is Money!

My Process
With my processes for organizing, it's no big deal for me to pack the night before an event. In fact, I do it often! This is how streamlined my packing has become. I know exactly what to pack, where it's packed, and how to pack it the same way each and every time. I make efficient organizational systems for myself so that packing is super easy, and you can do it too!

My Planning
In the before times, I also had awkwardly packed products and a disorganized mess behind my booth. The skill I had to learn, that made the biggest impact on my business overall, was how to plan!
Youngsters, Lazy Bones, and those with ADHD: Don't neglect your planning, because it will give you the biggest return on your time!
Once I planned out my organizational systems, they continued to work for me by keeping my products and supplies minimized and organized for the long haul! This didn't happen for me over night. Your process will be tweaked to fit your own needs over time, so be patient and learn to adapt any tips you enjoy to fit your own needs.
Follow a few of my organizational tips below, and one day, you'll realize just how much it PAYS to PLAN!

My Inventory
One of the first systems I planned, was my packing list.
For this, I recommend making an inventory of ALL of the items you will be bringing, including all of your products, your display equipment, your office supplies, your packaging supplies, emergency med kits, and administrative supplies.
I personally keep a digital packing list for my business, and a separate digital packing list for our personal travel suitcases. This ensures we never forget anything important, so I keep this document updated whenever I add or remove something from my line up.
I like to use Google Docs, Google Sheets, or just my phone's notebook app. I update this as I am packing, which is usually pretty easy, since I am just adding and removing a few items each time.

My Containers
The next system I planned out was how to protect my product during transportation.
I am a huge container person, but I don't just buy cute containers and hope they fit my needs. I plan the types of containers I need, based on:
How my items will fit into them.
How they will fit into my suitcases.
How efficiently they will serve me behind the booth during a sale.
When you organize anything, you organize for the space you have available, so take into account how much space you actually have.
Here are my FAVORITE containers for Artist Alley organization!

My Suitcases
My entire shop is condensed into 5-6 suitcases, all easily rolled smoothly from one location to another. However, if your product is thrown haphazardly into a suitcase with no more thought, it could get crushed or crumpled while the suitcases are moving around.
I like to pack my suitcases using smaller containers that fit my products snuggly, are easy to pack and unpack, and easy to locate behind my booth. For this reason, my items are always packed in clear bags and clear boxes, making locating the right product super quick and easy when it really counts!
Here are some of the smaller organizing containers I put into my suitcases.

My Coin Protectors
For stickers and magnets, I use clear binder pockets. You can search for card protectors if your stickers are small, but I opt for coin protectors, which can run a bit bigger. I store my stickers and magnets back to back in the same pocket, ensuring that when I find one, I also find the other. It's also very easy to see which products you are out of at a glance, so it's extremely handy for doing inventory! I also added my own Velcro dots to each pocket flap. This put an immediate end to losing any stickers to the likes of gravity!
My Poly Bags
The potential of clear poly bags cannot be overstated! They serve so many purposes, from protecting prints to built in advertising for your business!
I not only serve my customers their print purchases in these protective poly bags, but I use them, myself, to store and organize my print stock! Since poly bags are crystal clear, they make it extremely easy to flip through my stock behind the booth. I can see at a glance the exact print I'm looking for, again saving time....which is money!
As an added bonus for using poly bags, customers will also proudly parade your art around the event as they browse or hang with their friends, with YOUR artwork on display! With these crystal clear poly bags, your artwork easily becomes a conversational topic, and there's a good chance that anyone who sees it may head to your booth to grab one of your super cool prints for themselves!

My Print Boxes
For organizing and transporting art prints, I suggest using the above clear poly bags for storing each stack of prints, then gathering your stacks of neatly organized prints into a LABELED cardboard box. My favorite cardboard boxes, and the ones I highly recommend for you, are the ones your paper originally came in.
If you are unfortunate, your paper may have come wrapped in plastic. Fear not. You can buy these cardboard paper boxes online. They should be the same size as your print, so they fit snuggly inside and can't move around. Movement is the enemy of your precious art prints!

My Stackable Shoeboxes
I also suggest investing in clear, stackable containers without a lot of bulk or unnecessary wasted plastic. I use the thin, clear, plastic shoe boxes from Walmart to store all of my office supplies in, as well as my prepackaged acrylic items.
Stackable containers save space behind the booth, clear containers make it easy to find your items quickly, and the lighter they are and less plastic they use, the easier it is to condense and save space. Just make sure your lids snap securely in place. You don't want to skimp on quality, just bulkiness.

My Negative Space
The next system I needed a plan for, was moving my shop between locations!
I learned very quickly to be realistic about how much space I really needed in my suitcases, as well as my vehicle. We often need more space than we think, and this is the reason why it's very hard to pack up after an event sometimes. To avoid running out of space during break down, and risking having to carry MORE items out than you had when you came in, start with planning for the biggest containers first.
It's like that "sand, then rock" experiment. More fits into a space if the bigger items (the rocks) go into the bottle first. If the smaller items (the sand) go in first, there is often not enough room for the bigger items (the rocks).
We are often trying to squeeze our shop into spaces that are too small to begin with. Starting with your large containers will QUICKLY show you how much space you really need, so you can begin to plan more realistically if you find you need to eliminate something or buy another suitcase.
For the least amount of packing stress, large containers should fit a bit loosely, leaving some negative space around them. This way, you'll have room to place your smaller items around, and have the peace of mind of knowing you do not need to remember how to puzzle piece it back together perfectly, since you pre-planned to have plenty of space.
Failing to follow this very important packing process can potentially lead to at LEAST one big item that won't fit back in. This just leads to an extra item to carry out, and adds more time and stress to your break down process.

My Final Documentation
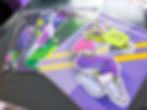
The very last step I take in my organizational process, once my suitcases are packed, is to lay them open and photograph the contents EACH AND EVERY TIME. You can delete these after each event if you like, but they will come in handy when it's time to pack up and go home, even if you're already super organized. Nobody's perfect, and having those photos can be a huge time saver!

My BONUS Tip!
My last suggestion to you, is keeping your suitcases packed.
This is not always viable if you need your product and supplies out at home, so what I do is I designate an entire suitcase to my packaging and shipping supplies, which I need both at events and in my home studio. This way, unpacking and packing is limited. I may need to grab some prints from my print bag to ship between events, but I still store them in the suitcases, only opening them as needed, then putting them back so they're ready to go.
This way, your shop only needs one organizational system, instead of one for events, and one for your studio!

My Community
I hope you have found something useful from these Artist Alley Organizing Hacks!
Let me know in the comments which one was your favorite, which ones you were already doing, if there is one you disagree with, or one that wouldn't work for you. I'd love to know more about your own systems, so feel free to share your favorite tips in the comments so we can all grow together!
Also remember to subscribe to My Cartoon Addiction for blog updates, cool discounts, and a FREE GIFT!
See you next time!